

Installing illuminated letters on a yacht is not the same as hanging a house number. One careless drill bit, an unsealed stud hole, or a misrouted LED feed can stain gelcoat, invite water into the laminate, or leave a dark corner in the name the first night guests arrive. Installing a backlit yacht sign safely means treating layout, drilling, wiring, and marine sealant as one system—not four improvisations on launch day. Whether you are a captain coordinating a yacht refit, a yard fitter executing a naval architect specification, or an owner reviewing a quote from a shipyard sign supplier, this guide walks through practical steps so the letters look intentional by day and sealed for seasons of salt spray.
Before You Drill: Safety, Scope, and Tools
Most installation failures start before the first hole. Confirm the letter set matches the vessel’s DC voltage, stud pattern, and finish, and that the hull zone is free of cores, tanks, and cable runs you must not pierce. Review the mechanical path in our installation overview and the fitting workflow in yacht sign fitting so the crew shares one brief.
- Power lock: confirm 12V or 24V circuit capacity, polarity, and fuse size before the sign leaves the crate—see 12V vs 24V LED systems.
- Surface readiness: wash, dry, and mask the install zone; note existing chips so they are not blamed on new work.
- Access: open lockers behind the transom or quarters so you can catch studs, seal from inside, and route cable without guessing.
- PPE and hull care: eye protection, dust control on gelcoat, and soft pads under ladders or scaffolding so topsides stay unscarred.
- Kit checklist: full-size template or vinyl proof, center punch, sharp bits sized to studs, marine sealant, tinned cable, sealed connectors, torque notes from the fabricator.
A durable backlit yacht sign install assumes the letters arrived as a sealed marine package—not DIY LED strips behind acrylic. If modules, potting, or harness quality are unclear, pause and align with the waterproofing expectations in marine-grade LED waterproofing (IP67 vs IP68).
Step-by-Step: Safe Installation Sequence
Use this sequence as the yard whiteboard checklist. Do not skip dry-fit or sealant cure windows to “save a day” on a compressed refit schedule.
- Unpack and inventory: match each letter to the packing list; inspect polish, studs, and cable exits under good light.
- Dry-fit the template: tape the full-size layout to the hull; step back for dock sightlines and legal name hierarchy.
- Mark stud centers: transfer hole positions through the template; center-punch so bits do not walk on curved gelcoat.
- Drill and clean: drill to the specified diameter and depth; deburr; vacuum dust from both sides of the laminate.
- Dry-fit letters: offer up each character on studs without sealant; confirm spacing, height, and cable reach.
- Seal and set: apply marine sealant at penetrations; seat letters; secure fasteners to fabricator torque—do not crush the seal bead.
- Wire and fuse: route tinned marine cable to the dedicated breaker; terminate with sealed connectors; verify polarity.
- Commission: test glow before final cleanup; photograph day finish and night halo; schedule a washdown only after sealant cure.
For custom programs, share transom photos and access notes early via how it works so stud maps and cable exits are designed for your hull—not adapted on the dock.
Layout Proofs: Getting Position Right the First Time
Position errors are expensive because they become permanent holes. Approve a paper or vinyl full-size proof against the real hull color and curvature before metal is committed—and again before you drill.
- Centerline and height: align the name with the vessel’s visual center, swim-platform sightlines, and any hailing-port hierarchy.
- Stand-off clearance: confirm letter depth clears rails, fenders, and tender contact zones while leaving enough air for an even halo.
- Curvature: on rounded transoms, check that stud lengths and letter backs follow the mold—do not force flat letters into a compound curve.
- Refit scars: if replacing vinyl or older letters, plan patch and fairing before new holes so the custom yacht sign sits on a true surface.
Aesthetic placement still belongs in the design brief—fonts, finish, and glow should agree with the vessel story covered in matching yacht signs to boat aesthetics—but the physical proof is what protects the gelcoat.
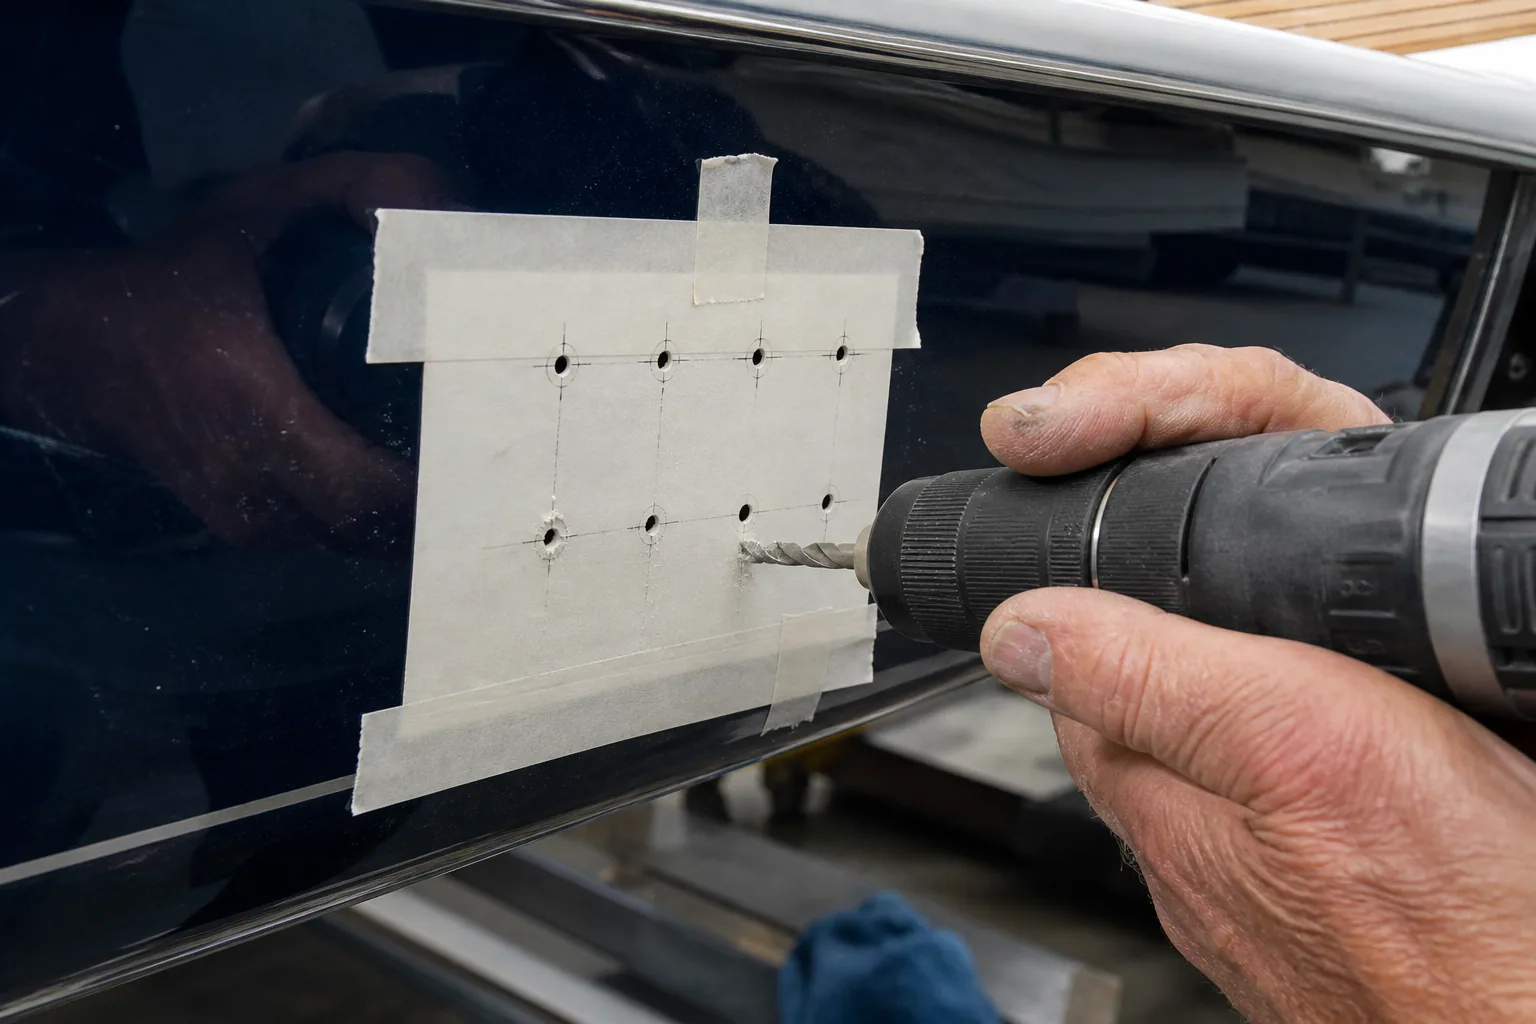
Template-marked stud centers — punch and drill only after a dry-fit sightline check. Installation.
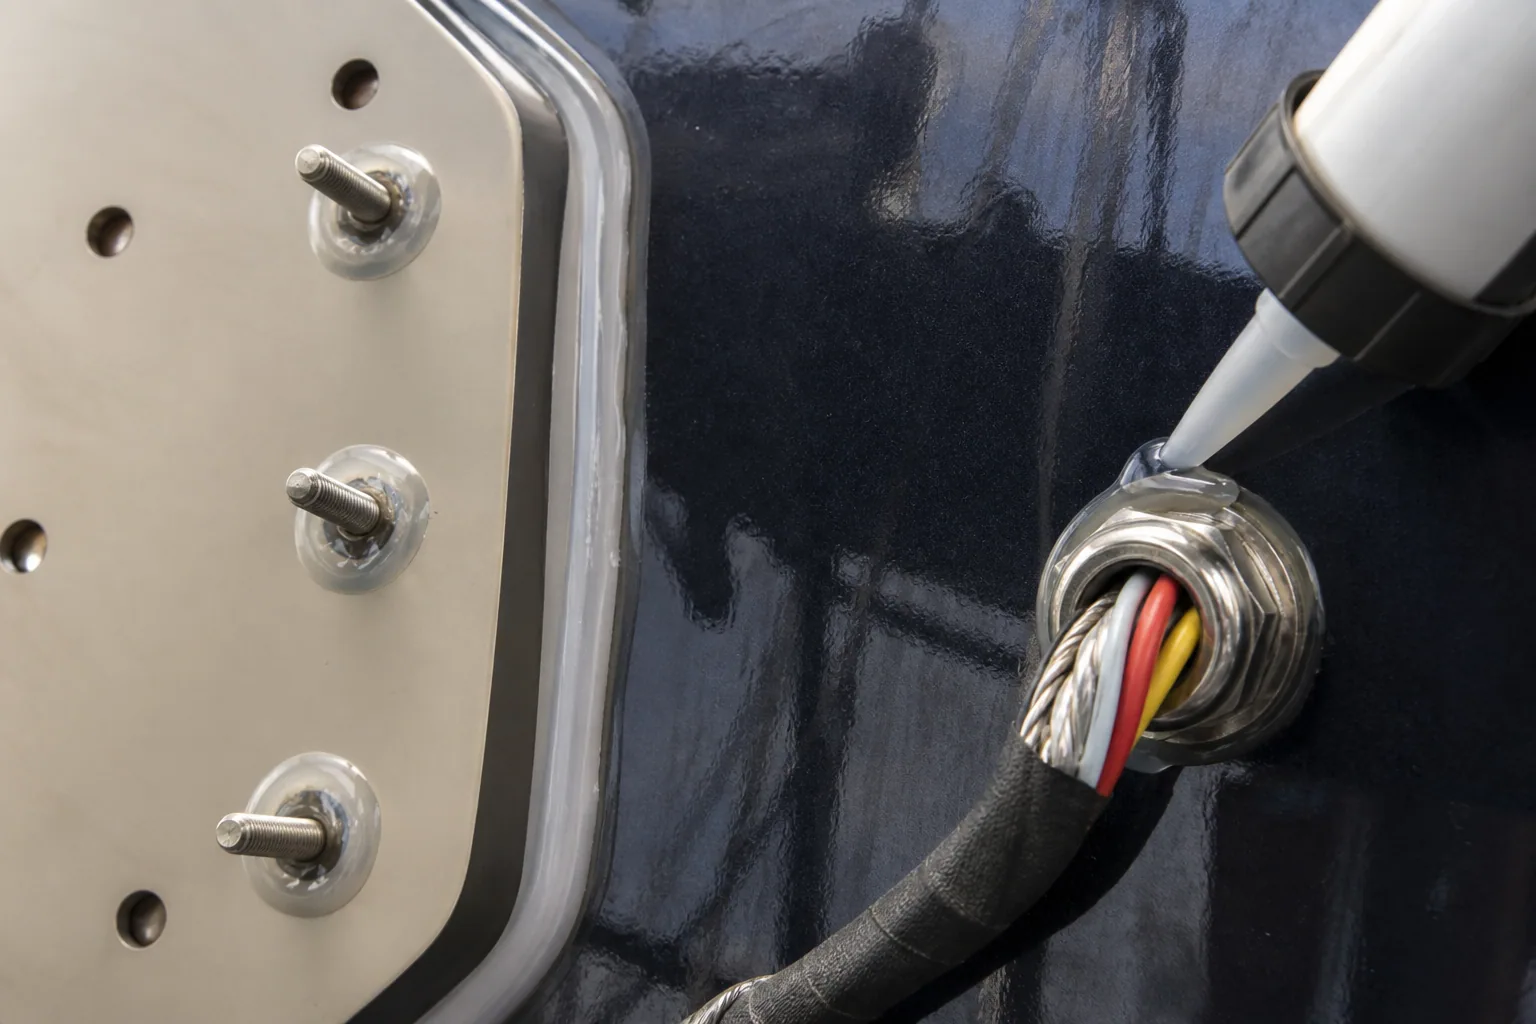
Marine sealant at studs and cable glands — the waterproof barrier that protects laminate and LEDs. Yacht Sign Fitting.
Drilling Stud Holes Without Damaging the Hull
Drilling is where caution pays for itself. Gelcoat chips and oversized holes create water paths that no amount of polish can hide later.
- Bit size: match the fabricator’s stud diameter with a snug clearance—oversized holes starve sealant and invite wobble.
- Speed and pressure: start slow with a pilot; let the bit cut; support thin panels from behind when possible.
- Core awareness: if the zone is cored, follow yard procedure for potting or sleeve inserts so fasteners do not crush the sandwich.
- Through-bolts vs blind studs: use the fastening method specified for that letter set; mixing methods mid-install breaks seal geometry.
- Clean both faces: remove dust and sharp edges so sealant wets the surface and washers seat flat.
Never drill “by eye” without the template once letters are mirrored stainless—small spacing errors shout from the dock. If laminate structure is uncertain, stop and involve the yard surveyor before you proceed; a delayed hole is cheaper than a structural repair.
Wiring the LED Feed: Path, Gauge, and Sealed Terminations
Backlit letters are only as reliable as the cable path behind them. Treat the electrical run as a wet-zone marine circuit, not a temporary extension lead.
- Dedicated fuse: protect the lettering circuit at the source; avoid sharing with windlass or thruster loads that sag voltage.
- Cable path: prefer existing conduits or planned penetrations; keep drip loops and strain relief at every exit.
- Gauge: size for amperage and run length so the furthest letter stays within driver tolerance—especially on long 12V stern runs.
- Connectors: use sealed, marine-rated terminations; label polarity on both harness and vessel side.
- Controller placement: if dimming or RGB control is specified, mount IP-rated gear in a dry, serviceable location—see lighting options.
Illumination quality still depends on even modules and diffusion inside illuminated yacht signage, but none of that optics work survives a wet splice or starved supply. For single-color elegance, confirm CCT against the brief for single-color LED packages before final termination.
Marine Sealant: Waterproofing Every Penetration
Marine sealant is the difference between a premium install and a slow leak into foam, timber, or locker linings. Every stud hole and cable gland that pierces the exterior skin needs a continuous, compatible seal—not a thin cosmetic smear.
- Product choice: use a marine-grade polyurethane or MS-polymer sealant rated for above-waterline exterior use and compatible with gelcoat and stainless—follow the letter fabricator’s approved list when provided.
- Surface prep: clean with the recommended solvent wipe; sealant fails on wax, silicone residue, or dusty holes.
- Technique: apply a continuous bead around each stud and under mounting pads; seat the letter so sealant extrudes slightly, then tool a neat fillet without starving the joint.
- Cable glands: seal the gland body to the hull and the cable to the gland; a dry connector hanging in a wet locker is still a future failure.
- Cure before abuse: respect full cure time before pressure washdowns, high-speed runs, or aggressive detailing chemicals.
Sealant at the hull is the installer’s half of waterproofing; potted LEDs and sealed harnesses are the fabricator’s half. Both must be right—review system thinking in IP67 vs IP68 guidance and material durability notes in 316L materials.
Need a stud map, voltage match, and install brief for your letters?
Commissioning Checklist for Captains and Yards
Close the job with evidence, not assumptions. A short commissioning pass catches seal gaps, polarity swaps, and uneven glow before the vessel leaves the yard.
- All letters seated, aligned, and free of trapped sealant strings on polished faces.
- Interior faces dry—no active weeping at studs after a controlled hose test once cure allows.
- Even halo across the name; no flicker on shore power vs generator transition.
- Breaker labeled; spare fuse noted in the vessel folder.
- Daytime finish photos and night approach photos archived for the owner.
- Maintenance handoff: freshwater rinse habits from stainless boat letter care.
When drilling, wiring, and marine sealant are executed as one plan, a backlit yacht name installs like any other well-specified exterior fitting—quiet, watertight, and ready for the first evening approach.
FAQ
Can I install a backlit yacht sign myself?
Owners with strong DIY skills can handle layout and mounting on simple solid-laminate zones, but most illuminated programs are safer with a yard fitter and marine electrician. The risk is not lifting the letters—it is drilling into unknown cores, sealing penetrations correctly, and matching DC voltage without voiding warranties. If you lack interior access or electrical confidence, hire professionals and keep the fabricator’s stud map on the bench.
What marine sealant should I use for yacht letter studs?
Use a marine-grade polyurethane or MS-polymer sealant approved for above-waterline exterior gelcoat and stainless contact. Avoid household silicone that oils out, fights paint, or fails under UV and washdowns. Follow the letter manufacturer’s approved product list when provided, prep surfaces thoroughly, and allow full cure before aggressive washdowns.
How do I drill gelcoat without cracking or spidering?
Tape the zone, center-punch through a full-size template, start with a sharp pilot bit at low speed, and support thin panels from behind when possible. Keep hole diameter snug to the stud specification—oversized holes chip more easily and seal poorly. Stop immediately if the bit chatters into a void or core; resolve structure before continuing.
How should LED wiring be routed for backlit yacht letters?
Run tinned marine cable on a dedicated fused circuit sized for voltage drop to the furthest letter. Use sealed connectors, drip loops, and strain relief at every hull penetration. Confirm polarity and system voltage before final termination, and keep controllers in dry, serviceable locations rather than in the splash zone behind the letters.
How long after sealing before I can wash the transom?
Follow the sealant manufacturer’s full cure schedule—often 24 hours for initial set and longer for complete cure depending on product, temperature, and joint thickness. A light freshwater rinse may be allowed sooner than pressure washing. Never blast fresh fillets with a high-pressure lance; you can hollow out the seal and create a hidden leak path.


