

Signage is rarely the largest line item in a yacht refit, yet it sits on the critical path twice: once when old letters come off and the transom is opened for wiring, and again when finished metal must land before photography, class walkthrough, or the owner's first night aboard. The superyacht signage checklist for refit captains and project managers is the handover that keeps name work from becoming a launch-week surprise—covering removal, specification, electrical routing, paint coordination, installation, and commissioning in one sequence you can run with the yard and your shipyard sign supplier. Whether you are refreshing vinyl, upgrading to illuminated 316L, or renaming after a change of ownership, this guide ties each phase to decisions that are cheaper in the refit window than after the stern is closed. Start with a custom yacht sign brief once the legal name string is frozen.
Phase 1: Assess What Is on the Stern Today
Before anyone quotes new letters, document the existing program as if you were handing the vessel to a new captain.
- Identify the medium: cast vinyl, painted stencil, stud-mount stainless, or a mixed stack with a crest.
- Photograph baseline: straight-on transom, offset angles, edge close-ups, and any peel or tea staining on old metal.
- Map penetrations: note existing holes, cable glands, and interior access to driver locations.
- Confirm legal string: documented name and hailing port per flag rules—see legal requirements for yacht names and ports of registry.
- Decide upgrade path: like-for-like replacement, vinyl-to-LED upgrade, or a rename with new artwork.
If the program is flat film today, read retrofitting vinyl decals to premium LED signs before you promise the owner a dimensional stern without a fairing budget.
Phase 2: Freeze Specification Early
Refit schedules slip when artwork stays "almost final." Lock these items at systems freeze so a naval architect specification and supplier can work in parallel with paint and AV.
- Exact spelling and punctuation—no placeholders once vectors go to the fabricator.
- Type family and finish (mirror vs brushed) as one marque across transom, quarters, and flybridge if multiple planes are in scope.
- Material: marine-grade 316L stainless steel for exterior faces; confirm diffuser spec if backlit.
- Lighting intent: single-color halo vs RGBW; align with deck ambiance under illuminated yacht signage.
- Mounting method: stud map, stand-off depth, and sealant spec for the paint system in use.
- Lead time: buffer drawing approval, fabrication, QC photos, export paperwork, and freight—see refit yard timing for custom lettering.
Yards integrating signage on new builds use a similar pack; refit teams can mirror it from yacht builder signage integration even when the hull is ten years old.
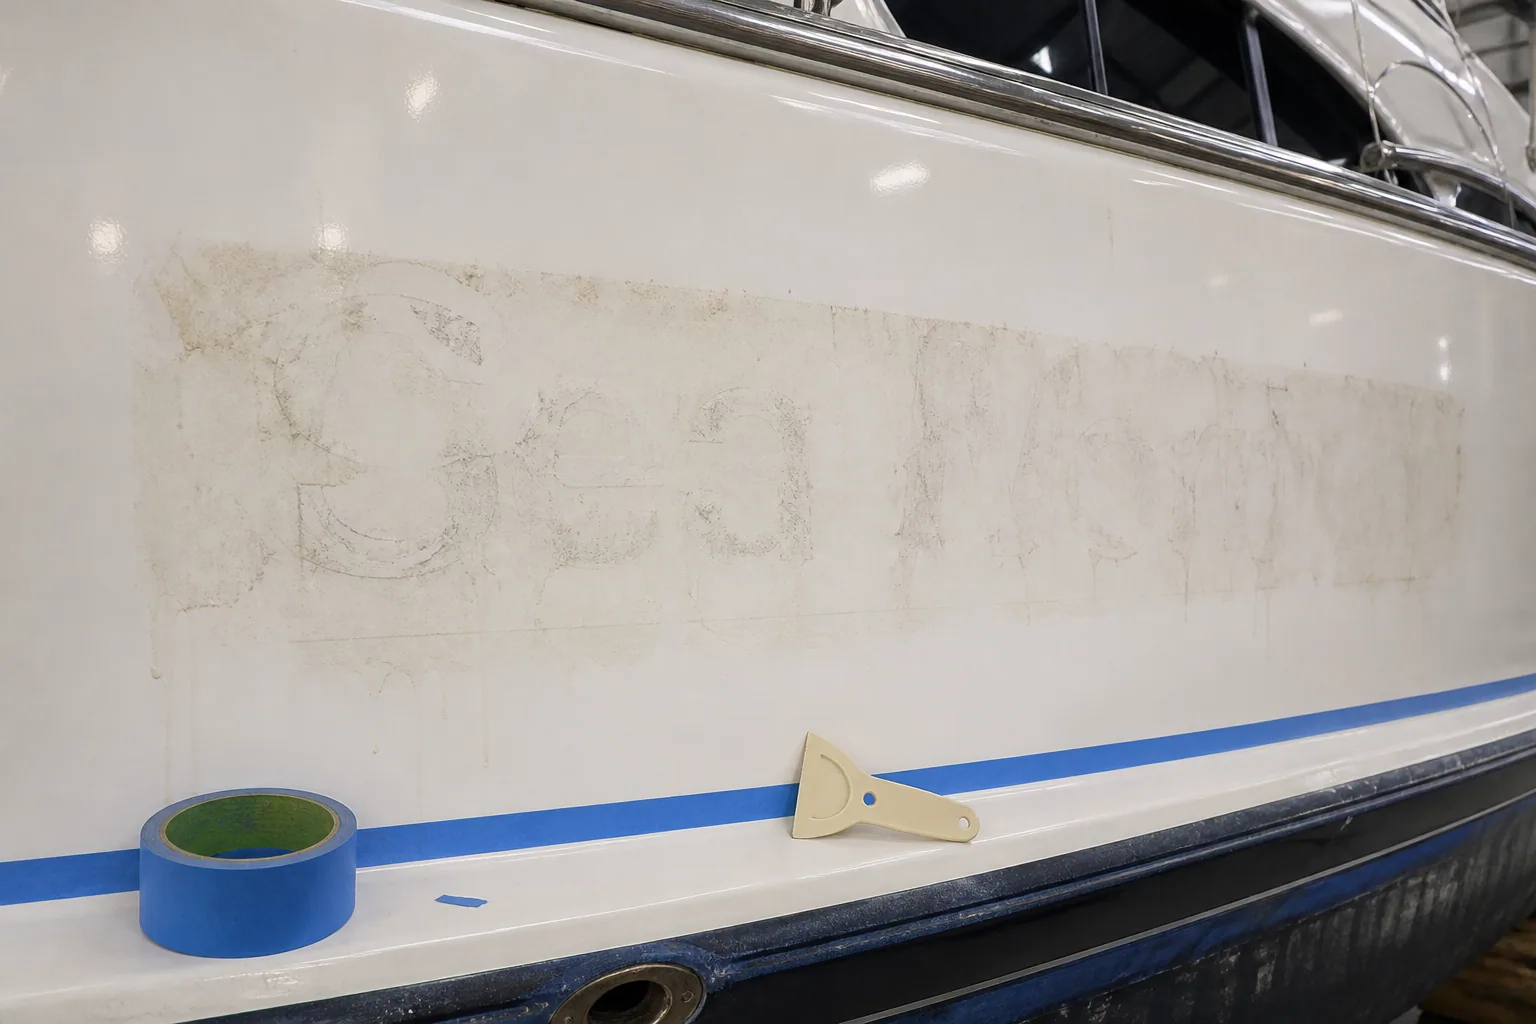
Removal and fairing decide whether new letters sit on a quiet plane—or fight ghosted adhesive. Mirror Stainless Steel.
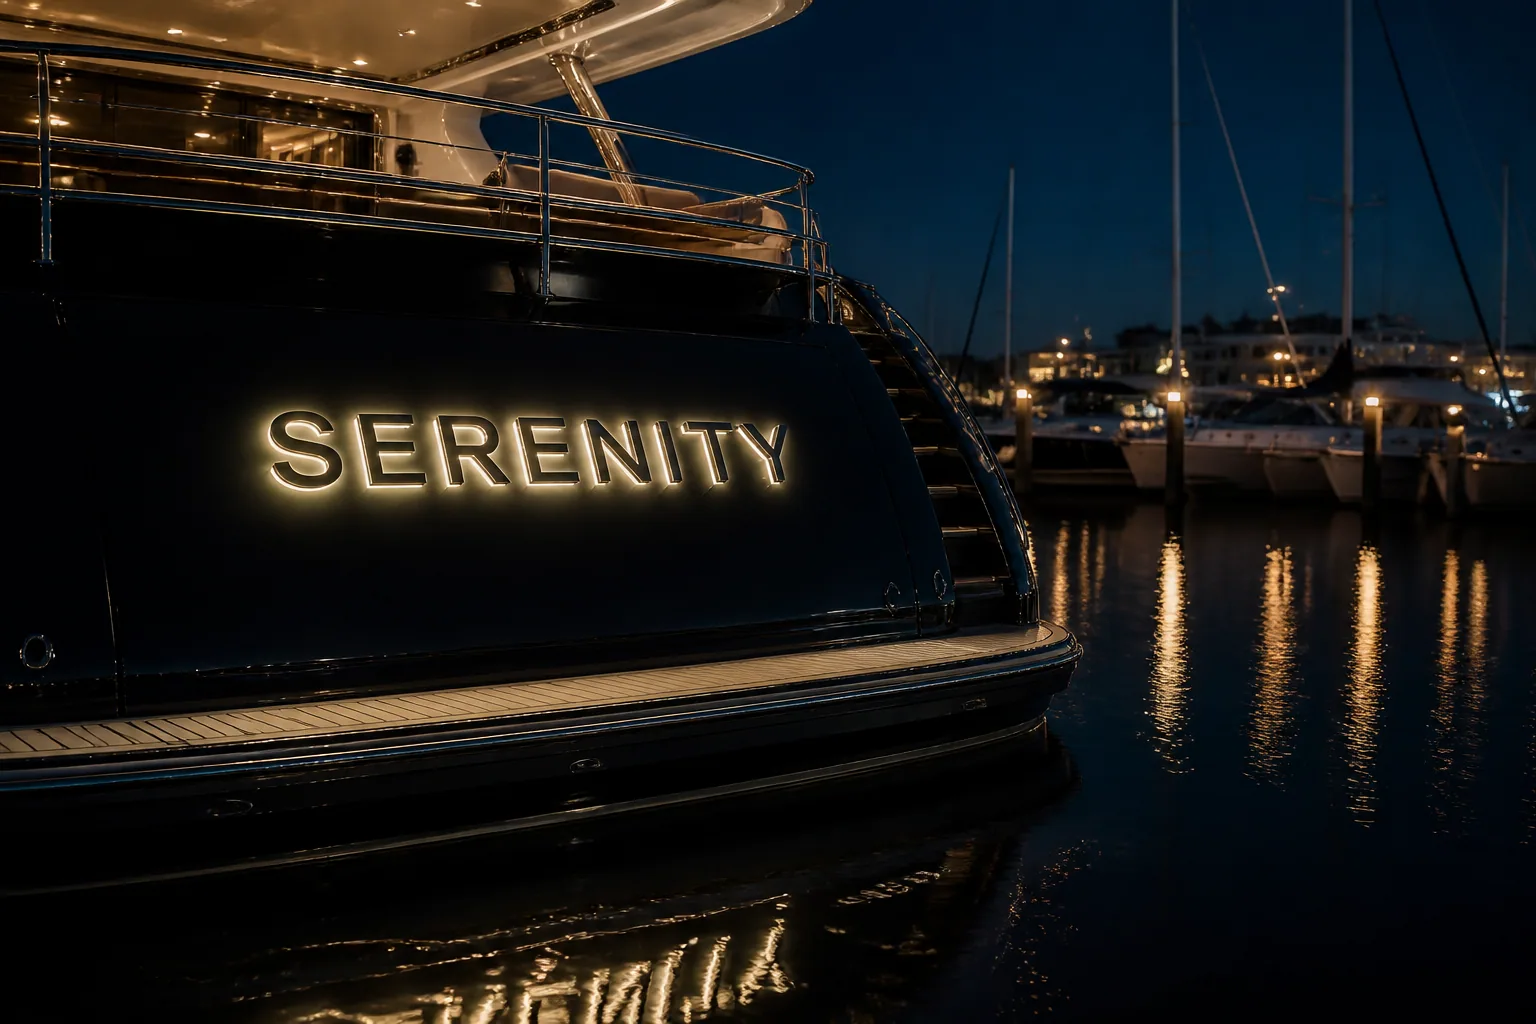
Night commissioning catches uneven halo before the owner’s first arrival. Single Color LED.
Phase 3: Electrical and Penetrations in the Refit Window
Retrofit wiring after letters arrive costs more than routing cable while lockers and headliners are open.
- Confirm system voltage: 12V or 24V DC; fuse and switch locations agreed with the yard electrician—details in 12V vs 24V LED systems on luxury vessels.
- Route cable paths from transom to driver locker before composite close-out.
- Specify glands and sealant at every penetration; IP-rated assemblies for spray zones.
- Plan dimming and controls where guests and crew can reach them without opening joinery in anger.
- Label drivers and fuses on the refit electrical drawing set so future crews inherit clarity.
Waterproofing discipline matters as much as voltage—review marine-grade LED waterproofing (IP67 vs IP68) before you sign off penetrations.
Phase 4: Coordinate Paint, Fairing, and Measurement
Letter height and stud spacing are measured from the finished mounting plane—not from green primer or a brochure rendering.
- Remove old media completely; fair ghosting and seal per paint manufacturer guidance.
- Respect cure windows before final dimensioning; microgeometry shifts after fairing are real on large transoms.
- Share paint codes and finish type with the supplier for contrast mock-ups and layout proofs.
- Validate against hardware: swim platforms, caprails, and tender garages that intrude on the quiet rectangle—placement guidance in yacht name placement: transom vs quarters vs flybridge.
- Approve a layout proof on hull photos or a verified template before metal is cut.
Phase 5: Installation Day Checklist
Treat fitment as a controlled procedure, not a "while you're here" task for a busy paint crew.
- Dry-fit with template or stud map before final sealant—confirm door swings and camera sightlines.
- Drill per supplier map; chase unknown cores with the yard, not by guesswork.
- Apply marine sealant in continuous beads; torque studs to spec without starving the gasket.
- Dress interior penetrations and strain-relief before closing lockers.
- Photograph spelling, finish, and alignment in soft daylight before night tests.
Step-by-step safety and sealing technique live in installing a backlit yacht sign safely and on installation—brief subcontractors before they open the first hole.
Phase 6: Commission, Document, and Hand Over
Operational acceptance is where captains earn their checklist. Project managers close the job when documentation is complete.
- Day test: finish quality, alignment, and tea-stain-free stainless after first washdown.
- Night test: even halo, no hot spots, switch and fuse verification—frame decisions with LED yacht lettering for night approach.
- Update AIS, stationery, and crew briefs if the name changed in the same window.
- File driver location photos, fuse ratings, and supplier contact in the vessel's technical folder.
- Schedule first maintenance per stainless maintenance guidance so charter washdowns do not damage mirror faces.
Master Checklist: Refit Signage at a Glance
Print this block for the project folder or yard notice board.
| Phase | Captain / PM action | Done? |
|---|---|---|
| Assess | Baseline photos; legal name confirmed; upgrade path agreed | ☐ |
| Specify | Artwork frozen; 316L + finish; voltage; lead time in master schedule | ☐ |
| Wire | Cable routed; glands sealed; fuses labeled on drawings | ☐ |
| Paint | Old media removed; fairing cured; layout proof approved | ☐ |
| Install | Stud map followed; sealant continuous; interior dressed | ☐ |
| Commission | Day + night photos; AIS updated; maintenance brief filed | ☐ |
When every box is ticked, the stern reads as intentional in broker photography and on the first night tender run—not as the trade that barely made launch.
Running a refit signage package? Send hull photos, voltage, and your launch window—we will return a layout proof and realistic lead time.
FAQ
When should signage work start during a superyacht refit?
Lock name, finish, and voltage at the refit kickoff—not the week before sea trials. Route cable and glands while interior panels are open, measure from the finished mounting plane after paint cure, and order letters with realistic fabrication and freight buffers. Signage that starts late usually means drilling finished gelcoat or skipping illumination.
How do you remove old yacht letters without damaging gelcoat?
Heat old vinyl or adhesive film per manufacturer guidance, lift slowly, and document ghosting before fairing. For stud-mounted metal, extract fasteners carefully and chase threads or fill holes per the paint spec. Never mount new letters over adhesive residue or peel outlines—fair and seal the plane first, then measure for the new stud map.
What electrical details do refit teams need for LED yacht signage?
Confirm 12V or 24V DC, fuse sizing, switch location, dimming intent, and cable path from the transom to the driver locker before the transom closes. Specify IP-rated penetrations and marine sealant at every gland. Commission with day finish photos and night halo shots so uneven glow is caught before guest arrival.
Who owns the signage checklist on a refit—the captain or the yard?
The project manager keeps the master schedule; the captain owns operational acceptance—radio clarity, night visibility, and crew access to drivers and fuses. The yard executes surface prep, penetrations, and fitment. The shipyard sign supplier returns layout proofs and stud maps. All three should sign off before metal ships.
What photos should captains send before ordering refit signage?
Straight-on and offset transom shots with a scale reference, close-ups of hardware in the name block, removal scars from old letters, interior access to cable routes, and paint codes when available. Include AIS spelling and the legal hailing port string. Incomplete hull photos are the most common reason layout proofs need a second round.


